 Loading...
Troubleshoot Your Leaky Toilet Flapper in 6 Easy Steps
A leaky toilet flapper is a common problem that homeowners face on regular basis. That annoying sound of trickling water indicates a leak in your toilet and an impending plumber visit to your house. Luckily, a quick inspection may be all that’s needed to locate the source of the leak. A leak with intermittent or constant trickling of water at the back of your toilet is generally due to a leaky flapper.
What is a Toilet Flapper?

A toilet flapper is a rubber seal between the toilet tank and the bowl. When the tank is flushed, the toilet flapper lifts upwards and allows water to rush to the toilet bowl. Over time, the flapper wears out - making the rubber seal harder, which lets water drip through the flapper valve even when the flush lever is in the resting position. The best solution to fix it is to replace the flapper.
Impact of a Leaky Flapper on Environment and Monthly Budget
An undetected leak due to a worn out flapper can cause as much as 300 gallons of excess water go down the drain each day. That is approximately three times the amount of water the average American uses in an entire day. A deteriorated flapper can also increase your water bill up by up to $50 per month while simultaneously raising your water footprint on the Earth.

How to Replace a Leaky Flapper
Step 1: Turn off the water and drain the flush tank
Turn off the water by shutting off the valve located at the water supply line of the toilet. Now, flush the toilet to drain the water from the flush tank. Keep the lever of the flush pressed downwards to drain the maximum amount of water from the flush tank.
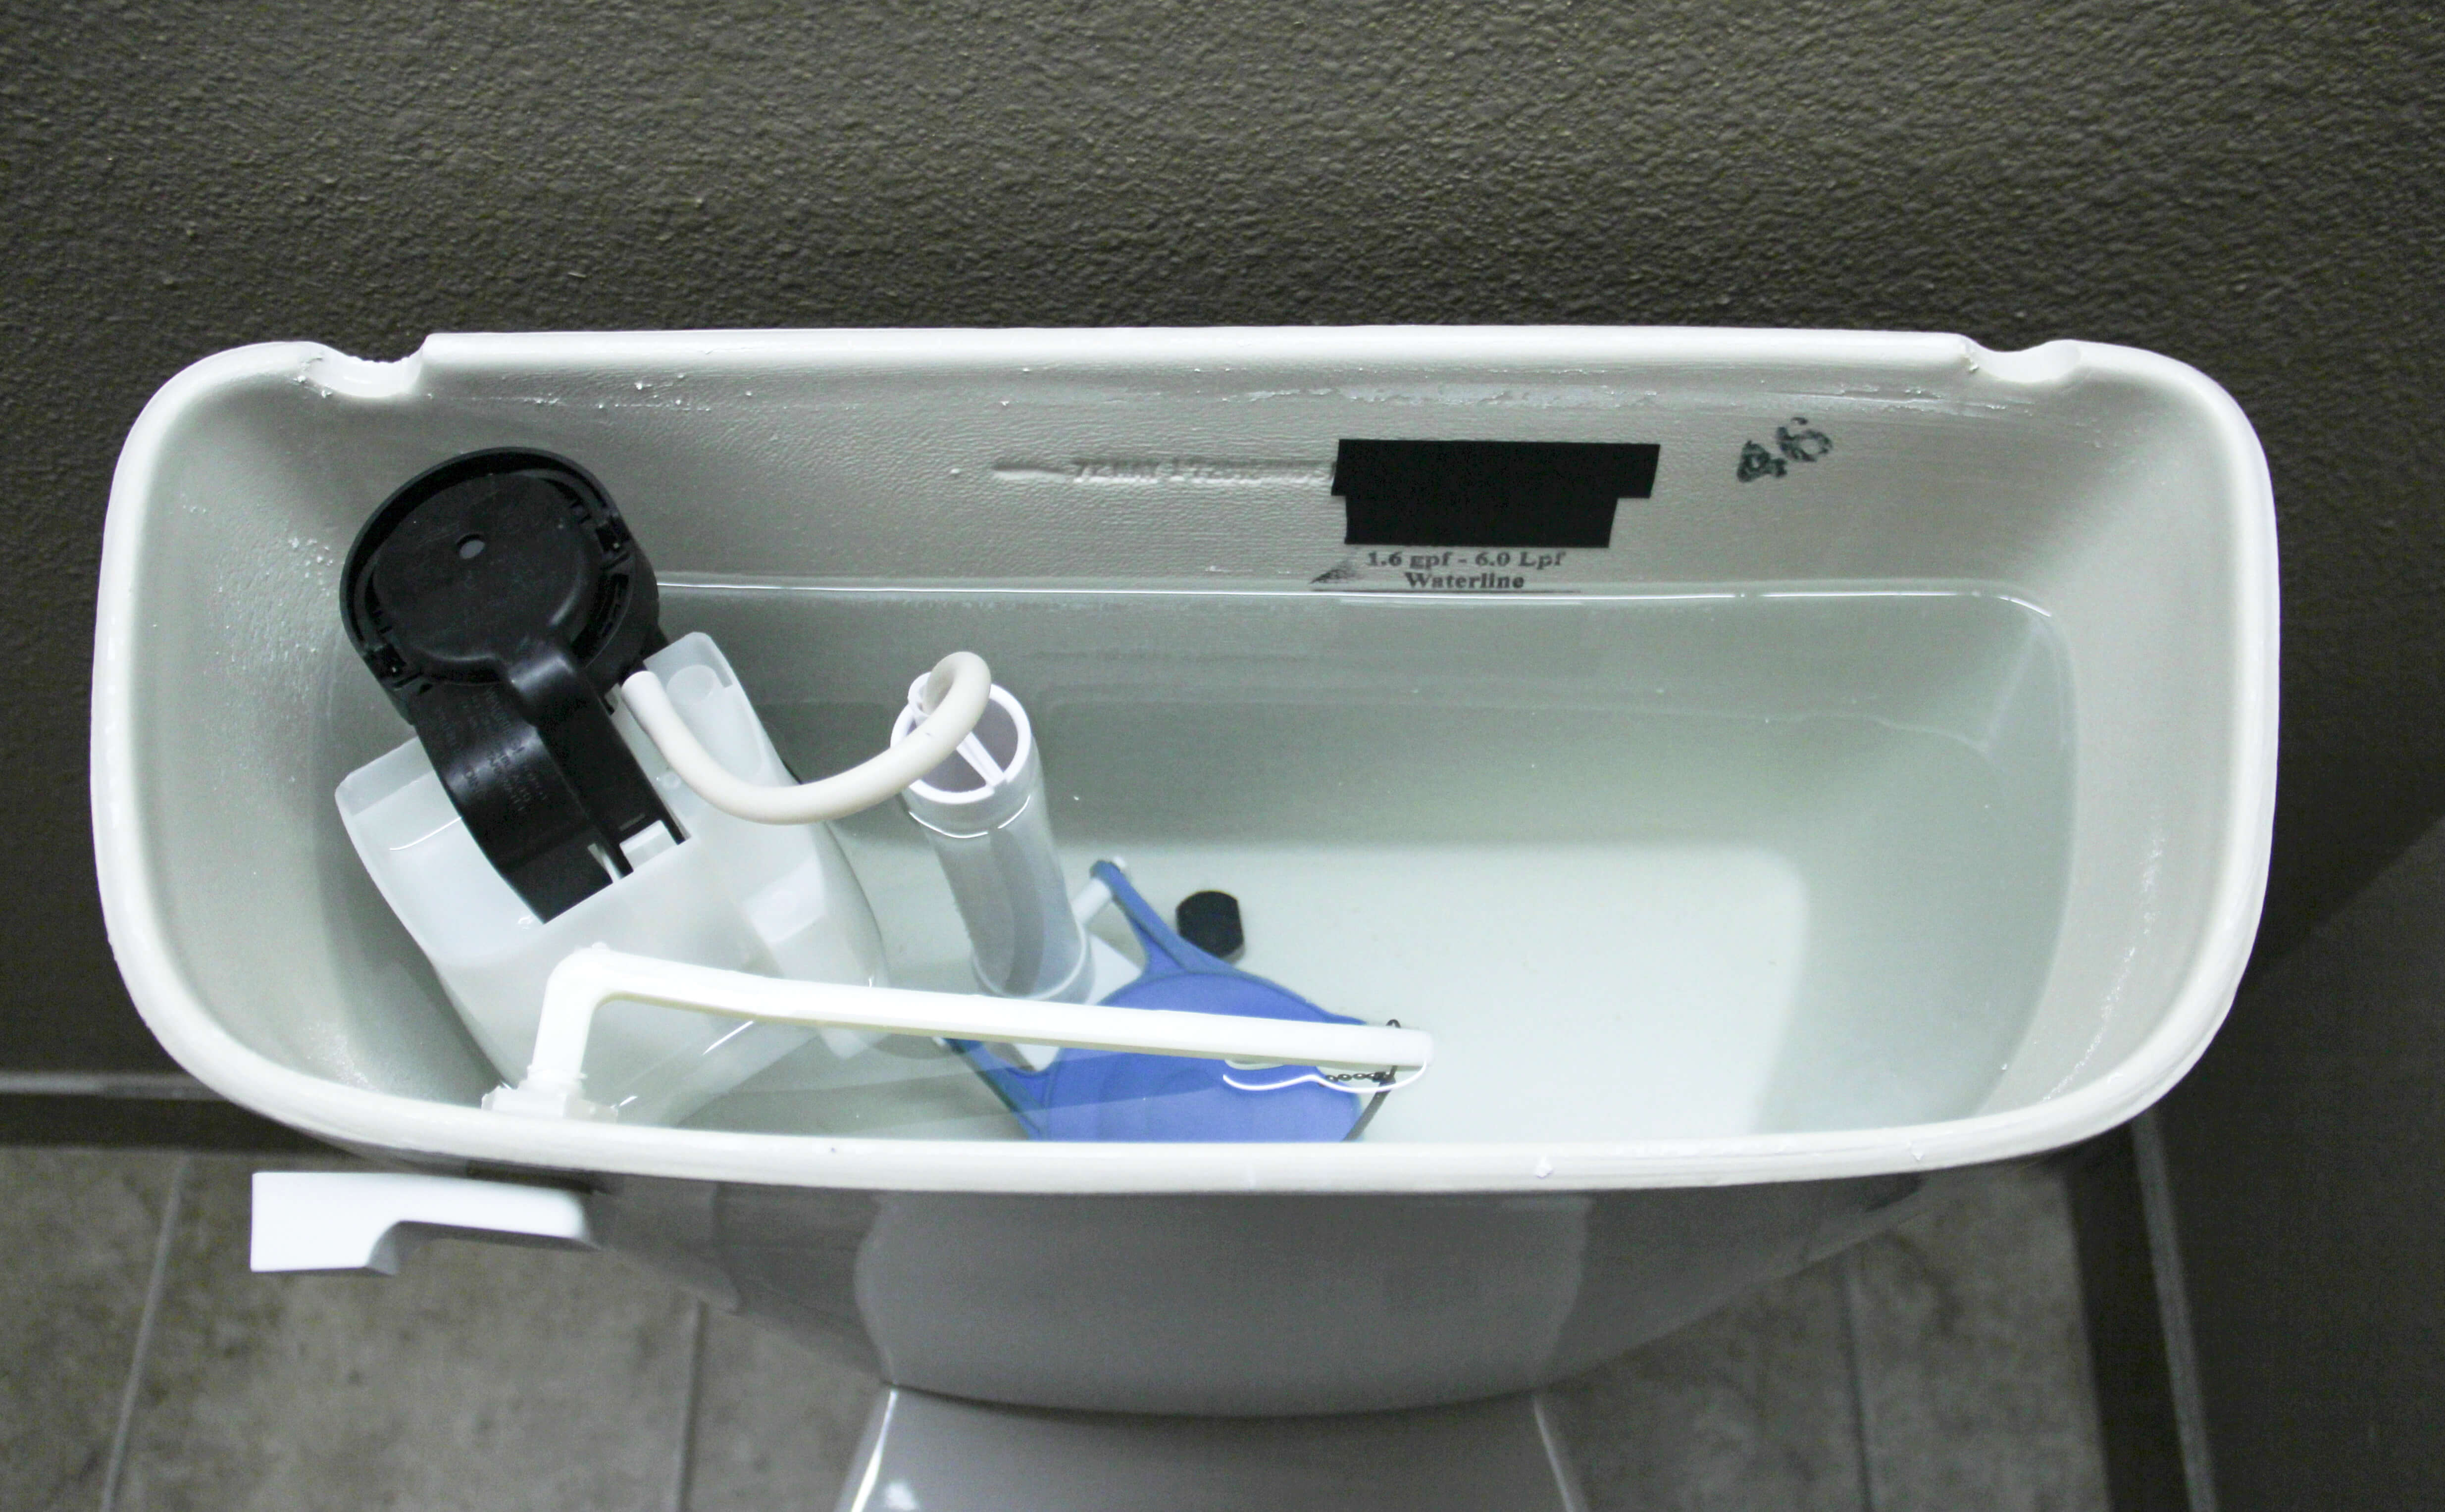
Step 2: Remove the toilet flapper
Take off the lid of the toilet to remove the flapper. Generally, the flapper valve is made of flexible rubber and is attached to a couple of pegs on the side of the overflow pipe. To remove, simply take off the arms from the pegs. If your flapper valve is made of hard plastic, then you will want to carefully lift the arms to allow the flapper to click out of place. The flapper valve is also attached to the handle lever with a metal chain. You need to unclip the arm from the chain to take the flapper out of the flush tank.
Step 3: Wipe the flapper’s area
After removing the worn-out flapper, clean any accumulated residue from that place to allow the new flapper to have a solid seal.
Step 4: Install the new flapper
Lower the new flapper into the flush tank and hook the arms of the flapper onto the pegs on the side of the overflow pipe. Then, connect the flapper chain to the handle lever. Make sure the chain stays little loose when the handle lever is in the resting position as a tight chain will not allow the flapper to seal completely.
Pro Tip: Flappers come in different sizes. Check the size of your flapper before buying the new one for your toilet.
Step 5: Turn on the water supply and test the new flapper
To make sure that the flapper is installed properly, open the shut off valve to the water supply and let water flow into the flush tank. Once the tank is filled, check for the flow of water into the toilet bowl. If there is no rush of water from the flush tank to the toilet bowl, you have successfully installed the toilet flapper. Next, flush the tank and check if the length of the chain connected to the handle lever is appropriate. If the chain is too long, it can get caught up under the flapper and won’t allow the flapper to seal tightly. Try shortening the length of the chain to resolve this problem.
Step 6: Place the lid over the flush tank
Once you are satisfied with your installation, replace the lid onto the flush tank and you are done.


